Fusion Project for Students | Pen Holder
Crafting Your First 3D Printed Pen Holder with Autodesk Fusion
Updated October 24, 2025
What You’ll Learn in This Tutorial
In the video at the bottom of this post, I show how to model a pen holder from scratch in Autodesk Fusion.
If you learn best by watching, the video walks you through the process in real time — while this written version adds extra context, design notes, and detailed screenshots to guide you step by step.
Project background
If you've ever scrolled through Etsy, you've likely noticed the burgeoning market for unique, 3D-printed items like pen holders. It's not just a hobby; people are making a decent income from these creative ventures. Let's dive into how you can design your own pen holder using Autodesk Fusion, turning your digital creativity into tangible products.
Check out the free Autodesk Fusion tutorial for this workflow at the end of this blog post.
Understanding Market Dimensions
Before we start, let's look at what's popular. I found a highly favored pen holder on Etsy with a diameter of 50 mm. This gives us a guiding dimension to ensure our design resonates with customer preferences.
Sketching the Basics
Begin by setting up a new component in Autodesk Fusion, placing your initial sketch on the XY construction plane.
Pressing the S key in Fusion opens the Design Shortcuts menu — a quick way to reach tools like Create Sketch or Extrude without breaking focus. It keeps your workflow efficient and your modeling faster.
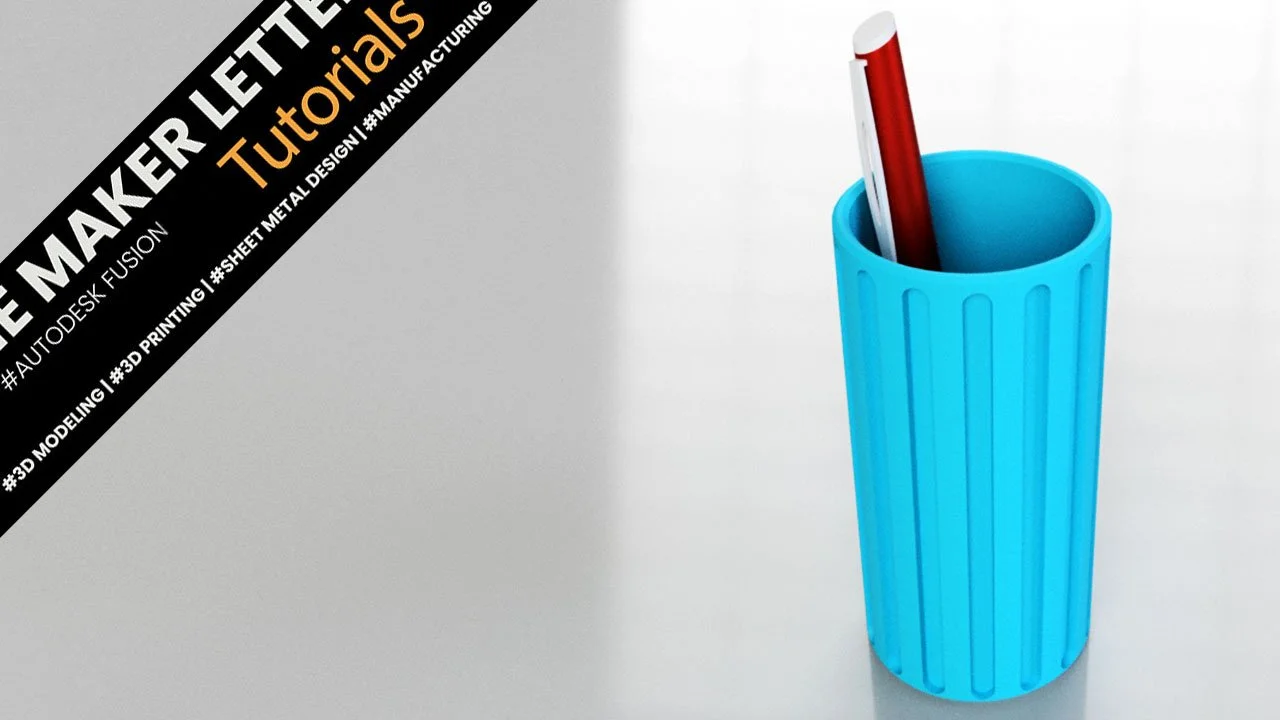
I'm aiming for a pen holder slightly over 100 millimeters tall to accommodate an embossed pattern, keeping the pattern height at around 100 mm. Instead of creating a solid block, we'll use the 'Thin Extrude' feature for efficiency. Set the inner wall thickness to 3 millimeters for sturdiness without excess material use.
Using the Extrude tool with the Thin Extrude option to turn the 2D circle into a hollow 3D cylinder. The 3 mm wall thickness provides strength, saves filament, and makes the pen holder lightweight and efficient to print.
Designing for Detail
Next, we'll create an offset plane -100 millimeters from our base to work on the emboss feature. Here, you can use the ViewCube for a clear perspective. Place your sketch on this plane, using a construction line to pinpoint the center for precision. Remember, this construction line is not part of your design.
An Offset Plane creates a new sketch plane at a controlled distance. It’s perfect for adding details or features above the base body without modifying the original geometry.
A new construction plane is created to the left of the pen holder in Fusion. This offset plane will be used for sketching new features beside the main body, keeping the design symmetric and organized.
A new sketch is drawn on the offset plane to add vertical details. Working on separate planes keeps designs organized and makes future edits easy.
For the emboss, I'm opting for a deboss effect which can give a unique look to our holder. Set the depth to 2 millimeters, knowing that with Autodesk Fusion's parametric modeling, adjustments are always a timeline click away.
The Emboss tool wraps a sketch around a curved surface, engraving or raising geometry directly on the model. It’s ideal for adding grip patterns or logos to rounded parts.
Pattern and Precision
To distribute this deboss evenly, use a circular pattern. Select 'Features' for your object type and the Z-axis for your pattern axis. This step instantly adds symmetry and aesthetic appeal to your design.
The first embossed slot is selected for duplication. Setting up a Circular Pattern saves hours when repeating identical features around a model.
The Circular Pattern command creates 15 evenly spaced slots around the cylinder. It’s an efficient way to add symmetry and style while keeping perfect spacing.
Sealing and Refining
Now, close the bottom of your pen holder. Use the Sketch Project to capture the base's outline, then extrude this to seal it off seamlessly with the rest of your model.
The Project tool copies edges from existing bodies into a sketch. This keeps new geometry accurately aligned with your current model — essential for precision and assembly fit.
A 3 mm Extrude Join adds a bottom plate to the pen holder. It strengthens the model and ensures a solid, watertight base for 3D printing.
To give your holder a professional finish, apply a chamfer. A 1-millimeter chamfer on the top edges will look sleek, while a 2-millimeter chamfer on the bottom will make the base more pronounced, enhancing the overall look.
A small 1 mm chamfer is added to the upper edge of the pen holder. Chamfers smooth sharp corners, improving both print quality and the feel of the finished 3D print.
The bottom edge gets a 2 mm chamfer. Larger chamfers make 3D prints easier to remove from the build plate and reduce stress points that can cause cracking.
Color and Material
Choose your filament wisely; I've gone with a matte blue plastic for this design. Customize further by right-clicking on the color to input an RGB code, tailoring your product to your vision or market demand.
A matte blue plastic material is applied to the pen holder and is then adjusted with custom RGB color codes. This gives a realistic surface preview and helps communicate texture and color in renders.
Final Touches and Rendering
Save your work with a descriptive version name. Switch to the render workspace to see your creation in simulated real-world conditions. Dim the brightness slightly for that professional touch in your presentation.
The project is saved with the version tag “Ready for rendering.” Versioning helps keep design progress organized and ensures you can revert easily if needed.
Brightness and ground reflections are adjusted in the Render workspace. Fine-tuning the environment helps control how shadows and highlights enhance the model.
Project Wrap-Up
In this project, you've navigated through Autodesk Fusion, using the ViewCube to manage your design perspective effectively. This pen holder project not only introduces you to the basics of 3D modeling but also sets you up to potentially sell on platforms like Etsy.
Happy Designing!
🧰 Tools & Deals
See all the tools, software, and gear I use on The Maker Letters – Tools & Deals .
These are the same resources I rely on for designing, 3D printing, and publishing every project. Some links are affiliate links — they help support the site at no extra cost to you.
Fusion assignment timestamps:
00:20: How to make a thin extrude in Fusion
00:49: How to create an Offset Plane in Fusion
01:33: How to create a center point slot sketch in Fusion
02:05 How to create a deboss pattern in Fusion
02:42 How to create a circular pattern in Fusion
03:34 How to project a sketch in Fusion
04:32 How to add a custom RGB code to an appearance in Fusion
You Might Also Like
If you enjoyed this Fusion project, explore these related step-by-step guides — each one builds new modeling skills you can use in your own designs.
These projects are perfect if you want to expand your Fusion skills, improve your 3D printing workflow, or simply find new ideas for your next creation.